Sympaメーリングリストサーバの構築
メーリングリストSympaの構築手順
オフィシャルのドキュメントに基づいて構築します
https://sympa-community.github.io/manual/install
環境の準備
- 必要なソフトウェアをインストールします
# yum install httpd mod_ssl mariadb-server postfix dovecot wget mailx telnet
- epelリポジトリおよびepel系パッケージをインストールします
# yum install epel-release
# yum install spawn-fcgi
- テスト用ユーザを作成します
# useradd test
# passwd test
ユーザー test のパスワードを変更。
新しいパスワード:
新しいパスワードを再入力してください:
passwd: すべての認証トークンが正しく更新できました。
Postfixの設定
単一ドメインでの簡易設定
- Postfixの設定を行う
# vi /etc/postfix/main.cf
-----------------------------
myhostname = mail.example.com

mydomain = example.com

myorigin = $mydomain

inet_interfaces = all
#inet_interfaces = $myhostname
#inet_interfaces = $myhostname, localhost
#inet_interfaces = localhost

#mydestination = $myhostname, localhost.$mydomain, localhost
mydestination = $myhostname, localhost.$mydomain, localhost, $mydomain
#mydestination = $myhostname, localhost.$mydomain, localhost, $mydomain,
#       mail.$mydomain, www.$mydomain, ftp.$mydomain

local_recipient_maps = unix:passwd.byname $alias_maps
#local_recipient_maps = proxy:unix:passwd.byname $alias_maps
#local_recipient_maps =

#mynetworks_style = class
mynetworks_style = subnet
#mynetworks_style = host

mynetworks = 192.168.0.0/24, 127.0.0.0/8
home_mailbox = Maildir/
- サービスの登録・起動を行う
# systemctl enable postfix
# systemctl start postfix
- メール送信のテストを行う
# mail test@example.com
Subject: test
test
.
EOT
- メール受信のテストを行う
# su - test
$ mail -f ~/Maildir
Heirloom Mail version 12.5 7/5/10.  Type ? for help.
"/home/test/Maildir": 1 message 1 new
>N  1 root                  Tue Jul 17 12:47  17/514   "test"
& quit
"/home/test/Maildir" complete
$ exit
Dovecotの設定
- サービス設定
# vi /etc/dovecot/dovecot.conf
-----------------------------
#protocols = imap pop3 lmtp
protocols = imap
- 認証設定
# vi /etc/dovecot/conf.d/10-auth.conf
-----------------------------
disable_plaintext_auth = no
- SSL設定
# vi /etc/dovecot/conf.d/10-ssl.conf
-----------------------------
#ssl = required
ssl = yes
- メール設定
# vi /etc/dovecot/conf.d/10-mail.conf
-----------------------------
mail_location = maildir:~/Maildir
- サービス登録・起動
# systemctl enable dovecot
# systemctl start dovecot
- 動作確認
# telnet localhost 143
Trying ::1...
Connected to localhost.
Escape character is '^]'.
* OK [CAPABILITY IMAP4rev1 LITERAL+ SASL-IR LOGIN-REFERRALS ID ENABLE IDLE STARTTLS AUTH=PLAIN] Dovecot ready.
1 login test 設定したパスワード
1 OK [CAPABILITY IMAP4rev1 LITERAL+ SASL-IR LOGIN-REFERRALS ID ENABLE IDLE SORT SORT=DISPLAY THREAD=REFERENCES THREAD=REFS THREAD=ORDEREDSUBJECT MULTIAPPEND URL-PARTIAL CATENATE UNSELECT CHILDREN NAMESPACE UIDPLUS LIST-EXTENDED I18NLEVEL=1 CONDSTORE QRESYNC ESEARCH ESORT SEARCHRES WITHIN CONTEXT=SEARCH LIST-STATUS SPECIAL-USE BINARY MOVE] Logged in
2 list "" *
* LIST (\HasNoChildren) "." INBOX
2 OK List completed.
3 select INBOX
* FLAGS (\Answered \Flagged \Deleted \Seen \Draft)
* OK [PERMANENTFLAGS (\Answered \Flagged \Deleted \Seen \Draft \*)] Flags permitted.
* 1 EXISTS
* 1 RECENT
* OK [UNSEEN 1] First unseen.
* OK [UIDVALIDITY 1531798588] UIDs valid
* OK [UIDNEXT 2] Predicted next UID
3 OK [READ-WRITE] Select completed (0.014 secs).
4 fetch 1 body[]
* 1 FETCH (FLAGS (\Seen \Recent) BODY[] {529}
Return-Path: <root@example.com>
X-Original-To: test@example.com
Delivered-To: test@example.com
Received: by mail.example.com (Postfix, from userid 0)
        id 19D89200758A; Tue, 17 Jul 2018 12:47:43 +0900 (JST)
Date: Tue, 17 Jul 2018 12:47:43 +0900
To: test@example.com
Subject: test
User-Agent: Heirloom mailx 12.5 7/5/10
MIME-Version: 1.0
Content-Type: text/plain; charset=us-ascii
Content-Transfer-Encoding: 7bit
Message-Id: <20180717034743.19D89200758A@mail.example.com>
From: root@example.com (root)

test
)
4 OK Fetch completed.
5 logout
* BYE Logging out
5 OK Logout completed.
Connection closed by foreign host.
Sympaのインストール
- Sympaリポジトリをダウンロード・配置します
# wget http://sympa-ja.org/download/rhel/sympa-ja.org.rhel.repo
# mv sympa-ja.org.rhel.repo /etc/yum.repos.d/
- リポジトリのキャッシュを更新します
# yum makecache
- Sympaのインストール
# yum install sympa sympa-httpd perl-DBI perl-DBD-MySQL
- SympaのエイリアスDBを再作成する
# rm /var/lib/sympa/sympa_aliases.db
# chown root.root /var/lib/sympa/sympa_aliases
# postalias /var/lib/sympa/sympa_aliases
# chown sympa.sympa /var/lib/sympa/sympa_aliases
# chown sympa.root /var/lib/sympa/sympa_aliases.db
データベースの作成・設定
- MariaDBの設定に下記を追加する
# vi /etc/my.cnf
-----------------------------
[mysqld]
character-set-server = utf8

[client]
default-character-set = utf8
- MariaDBを起動する
# systemctl enable mariadb
# systemctl start mariadb
- 初期設定をこなう
# mysql_secure_installation ----------------------------- NOTE: RUNNING ALL PARTS OF THIS SCRIPT IS RECOMMENDED FOR ALL MariaDB SERVERS IN PRODUCTION USE! PLEASE READ EACH STEP CAREFULLY! In order to log into MariaDB to secure it, we'll need the current password for the root user. If you've just installed MariaDB, and you haven't set the root password yet, the password will be blank, so you should just press enter here. Enter current password for root (enter for none): OK, successfully used password, moving on... Setting the root password ensures that nobody can log into the MariaDB root user without the proper authorisation. Set root password? [Y/n] New password: Re-enter new password: Password updated successfully! Reloading privilege tables.. ... Success! By default, a MariaDB installation has an anonymous user, allowing anyone to log into MariaDB without having to have a user account created for them. This is intended only for testing, and to make the installation go a bit smoother. You should remove them before moving into a production environment. Remove anonymous users? [Y/n] ... Success! Normally, root should only be allowed to connect from 'localhost'. This ensures that someone cannot guess at the root password from the network. Disallow root login remotely? [Y/n] ... Success! By default, MariaDB comes with a database named 'test' that anyone can access. This is also intended only for testing, and should be removed before moving into a production environment. Remove test database and access to it? [Y/n] - Dropping test database... ... Success! - Removing privileges on test database... ... Success! Reloading the privilege tables will ensure that all changes made so far will take effect immediately. Reload privilege tables now? [Y/n] ... Success! Cleaning up... All done! If you've completed all of the above steps, your MariaDB installation should now be secure. Thanks for using MariaDB! - データベースの作成
# mysql -u root -p
Enter password:
-----------------------------
MariaDB [(none)]> CREATE DATABASE sympa CHARACTER SET utf8;
MariaDB [(none)]> GRANT ALL PRIVILEGES ON sympa.* TO sympa@localhost IDENTIFIED BY '任意のパスワード';
MariaDB [(none)]> quit
初期設定
- 「sympa_wizard.pl」コマンドでコンフィグファイルを生成します
# sympa_wizard.pl
err Conf::_set_listmasters_entry() Robot  config: No listmaster defined. This is the main config. It MUST define at least one listmaster. Stopping here

** サービスの説明 **

* 基本メールドメイン名
domain [sympa-test.example.com] : example.com

* リスト システム管理者の電子メールアドレス
  ... Email addresses of the listmasters (users authorized to perform global
  server commands). Some error reports may also be sent to these addresses.
  Listmasters can be defined for each virtual host, however, the default
  listmasters will have privileges to manage all virtual hosts.
listmaster [your_email_address@sympa-test.example.com] : postmaster@example.com

* 言語の初期値
  ... Sympaが使う言語の初期値です。対応言語 (supported_language) のうちの一つ
  にします。
lang [en-US] : ja-JP

* 対応言語
  ... ユーザインタフェースが対応する言語全て。適切な翻訳カタログがインストール
  されていないものは無視されます。
supported_lang [ca,cs,de,el,en-US,es,et,eu,fi,fr,gl,hu,it,ja,ko,nb,nl,oc,pl,pt-BR,ru,sv,tr,vi,zh-CN,zh-TW] :

* サービスの題名
  ... メーリングリストサービスの呼び名。これはウェブインタフェースのヘッダや
  サービスメッセージの件名に使われます。
title [Mailing lists service] :

* Sympaの表示名
  ... このパラメータは、Sympa自身が送るメッセージの「From:」ヘッダフィールドの
  表示名に使います。
gecos [SYMPA] :

* 従来キャラクタセットへの対応
  ... 「有効」(on) に設定すると、charset.conf(5) 設定ファイルに基づく従来文字
  コード対応を有効にします。
  ... 言語によっては、電子メールメッセージで従来文字コード (キャラクタセット)
  を使うほうが望ましいです (たとえば日本語でのISO-2022-JP)。
legacy_character_support_feature [off] : on

** データベース関連 **

* データベースの種類
  ... Possible types are "MySQL", "PostgreSQL", "Oracle", "Sybase" and
  "SQLite".
db_type [mysql] :

* テータベースサーバのホスト名
  ... With PostgreSQL, you can also use the path to Unix Socket Directory,
  e.g. "/var/run/postgresql" for connection with Unix domain socket.
db_host [localhost] :

* データベース名
  ... With SQLite, this must be the full path to database file. With Oracle
  Database, this must be Oracle SID.
db_name [sympa] :

* データベース接続のユーザ名
db_user [user_name] : sympa

* データベース接続のパスワード
  ... パスワードを使うかどうかにかかわらず、SQLサーバへのアクセスは制限してく
  ださい (サービスをインターネットに公開してしまっていませんか)。
db_passwd [user_password] : 任意のパスワード

* Syslogサーバとの通信方式
log_socket_type [unix] :

* メッセージの最大サイズ
  ... Incoming messages smaller than this size is allowed distribution by
  Sympa.
max_size [5242880] :

* sendmailのパス
  ... Absolute path to sendmail command line utility (e.g.: a binary named
  "sendmail" is distributed with Postfix).
  ... Sympa expects this binary to be sendmail compatible (exim, Postfix,
  qmail and so on provide it).
sendmail [/usr/sbin/sendmail] :

** 権限 **

* リストを作成できるのは
  ... Defines who can create lists (or request list creation) by creating new
  lists or by renaming or copying existing lists.
create_list [public_listmaster] :

* ブラックリストの使用
  ... ブラックリストを適用する操作 (複数あるときはカンマで区切る)。このパラ
  メータを「何もしない (none)」に設定すると、ブラックリスト機能は画面に出なく
  なります。
use_blacklist [send,create_list] :

* List of required domains for list owner addresses
  ... Restrict list ownership to addresses in the specified domains. This can
  be used to reserve list ownership to a group of trusted users from a set of
  domains associated with an organization, while allowing moderators and
  subscribers from the Internet at large.
owner_domain [] :

* Minimum number of owners for each list that must match owner_domain
  restriction
  ... Minimum number of owners for each list must satisfy the owner_domain
  restriction. The default of zero (0) means *all* list owners must match.
  Setting to 1 requires only one list owner to match owner_domain; all other
  owners can be from any domain. This setting can be used to ensure that there
  is always at least one known contact point for any mailing list.
owner_domain_min [0] :

** 投稿保管庫 **

* 配送したメッセージを投稿保管庫に格納する
  ... 有効にすると、リストを通じて配信されるメッセージは投稿保管庫に入ります。
  そうでなければ投稿保管庫は無効になります。
  ... なお、このパラメータを無効にしても過去の投稿保管庫は削除されず、リスト毎
  のアクセス設定に従って閲覧できます。
process_archive [off] :

* カスタムのアーカイブ プログラム
  ... MHonArcの代わりにカスタム投稿保管ソフトウェアを使うようにする。パラメー
  タの値はカスタム投稿保管ソフトウェアのファイルシステム上での絶対パス。
  ... Sympaはこのファイルを次の2つの引数をつけて実行します。
  ... 「--list リスト名」
  ... ドメイン部を含むメーリングリストのアドレス。
  ... 「--file ファイル名」
  ... 投稿保管庫に入れるメッセージへの絶対パス。
custom_archiver [] :

** 配送エラー管理とメッセージ追跡 **

* Default bounce warn rate
  ... 配送したメッセージのうち配送エラーを起こした数 (パーセント) がこの値を超
  えたら、リストのオーナーに警告を送ります。
bounce_warn_rate [30] :

** タグ付けによるスパム排除 **

* スパムの印になるヘッダフィールド
  ... スパムフィルタ (SpamAssassinやj-chkmailなど) がスパムを検出したことを示
  すヘッダフィールドを追加しているとき、そのヘッダフィールドの名前 (たとえば
  「X-Spam-Status」)。
antispam_tag_header_name [X-Spam-Status] :

* スパムの印になるヘッダフィールドを検査する正規表現
  ... そのヘッダでメッセージがスパムかどうか確認する正規表現 (たとえば
  「Yes」)。
antispam_tag_header_spam_regexp [^\s*Yes] :

* スパムか非スパムかを判定する正規表現
  ... そのヘッダフィールドでメッセージがスパム*ではない*かどうか確認する正規表
  現 (たとえば「No」)。
antispam_tag_header_ham_regexp [^\s*No] :

* 結果を通知するヘッダフィールド
  ... メッセージがスパム排除ソフトウェアで処理されており、そのソフトウェアがあ
  るヘッダを追加するとします。このパラメータを使って、メッセージがスパムかどう
  かの状態 (「ham」、「spam」、「unsure」) を決定する特別なシナリオを選択しま
  す。このパラメータは次のパラメータを置き換えます。antispam_tag_header_name、
  antispam_tag_header_spam_regexp、antispam_tag_header_ham_regexp。
spam_status [x-spam-status] :

* 投稿を保管するディレクトリ
  ... Where to store HTML archives. This parameter is used by the
  "archived.pl" daemon. It is a good idea to install the archive outside the
  web document hierarchy to prevent overcoming of WWSympa's access control.
arc_path [/var/lib/sympa/arc] :

** ウェブ インタフェースのパラメータ **

* ウェブ インタフェースのURLプリフィクス
  ... ウェブ インタフェースでURLに使われます。
wwsympa_url [http://sympa-test.example.com/sympa] : http://example.com/sympa

* 静的コンテンツのURL
  ... HTTPサーバはこのパスを static_content_path のディレクトリと対応させなけ
  ればいけません。
static_content_url [/static-sympa] :

** ウェブ インタフェースのパラメータ――外見 **

* メインページの種類
  ... 「lists」でリストの一覧ページ。「home」でホームページ。
default_home [home] :

* ウェブ投稿保管庫の初期の表示順
  ... thrd: Threaded index.
  ... mail: Chronological index.
archive_default_index [thrd] :

* 共有文書置き場の容量制限の初期値
default_shared_quota [] :

* HTMLエディタを使う
  ... 「on」に設定すると、利用者がJavaScriptのWYSIWYGエディタを使ってHTMLで
  メッセージを投稿できるようになります。
use_html_editor [0] :

** S/MIME および TLS **

* 信頼できる認証局の証明書を含むファイル
  ... This can be used alternatively and/or additionally to "capath".
cafile [] :

* 信頼できる認証局の証明書が置かれるディレクトリ
  ... CA certificates in this directory are used for client authentication.
  ... The certificates need to have names including hash of subject, or
  symbolic links to them with such names. The links may be created by using
  "c_rehash" script bundled in OpenSSL.
capath [] :

* リストの秘密鍵の暗号化パスワード
  ... 設定しなければ、Sympaは秘密鍵を暗号化されていないものとして扱います。
key_passwd [] :

** ウィルス検出プラグイン **

* ウィルススキャナエンジンのパス
  ... 対応しているウィルス検出ソフトウェアは、Clam AntiVirus (clamscan、
  clamdscan)、McAfee (uvscan)、Fsecure (fsav)、Sophos、AVP、Trend Micro/
  VirusWall
antivirus_path [] :

* ウィルス検出ソフトウェアのコマンドライン引数
antivirus_args [] :

** パスワード強度検査 **

* パスワード強度検査
  ... 利用者のパスワードの強度を検査する方法。Data::Passwordによるオプションを
  設定できます。
  <http://search.cpan.org/~razinf/Data-Password-1.07/Password.pm#VARIABLES>
password_validation [] :
/etc/sympa/sympa.conf を更新しました。
前のバージョンは /etc/sympa/sympa.conf.2018-07-20-16-35-38 として保存してありま す。
- データベースの投入
# sympa.pl --health_check
ログの作成
- rpmで作成されたsyslog用configを確認
vi /etc/rsyslog.d/sympa.conf
--------------------
local1.* /var/log/sympa.log
- rsyslogをリロードする
# systemctl restart rsyslog
- ログ出力のテスト
# perl /usr/share/sympa/bin/testlogs.pl
Ok, now check logs
- ログの確認
# cat /var/log/sympa.log
Jul 20 16:42:33 sympa-test sympa/testlogs[11030]: info main:: Logs seems OK, default log level 0
Sympa、Postfix連携設定
- aliasesファイルの編集
# vi /etc/sympa/aliases.sympa.postfix
-----------------------------
viで「:%s/my.domain.org/example.com/g」を実行(一括置換)
- 「/etc/sympa/aliases.sympa.postfix」がコロン区切りのエイリアスのため、postmapではなくpostaliasを使用するように変更
※「/usr/share/sympa/default/list_aliases.tt2」を「/etc/sympa」にコピーしてテンプレートを別途作成し、コロン区切りでない
形式で書き直した場合はpostmap(デフォルト値)のままでOKvi /etc/sympa/sympa.conf -------------------- # 末尾に追加 aliases_program postalias
- サービスを再起動する
systemctl restart sympa
- aliasesファイルの更新
# postalias hash:/etc/sympa/aliases.sympa.postfix
- エイリアスの更新
更新後、sympa_aliases.dbがコマンド実行時刻に更新されていることを確認# sympa_newaliases.pl # ls -l /var/lib/sympa/ … … -rw-r--r-- 1 sympa root 12288 6月 26 10:02 sympa_aliases.db
- postfix側の設定変更
# vi /etc/postfix/main.cf
-----------------------------
#alias_maps = dbm:/etc/aliases
#alias_maps = hash:/etc/aliases
#alias_maps = hash:/etc/aliases, nis:mail.aliases
#alias_maps = netinfo:/aliases
alias_maps = hash:/etc/aliases, hash:/etc/sympa/aliases.sympa.postfix, hash:/var/lib/sympa/sympa_aliases

#alias_database = dbm:/etc/aliases
#alias_database = dbm:/etc/mail/aliases
#alias_database = hash:/etc/aliases
#alias_database = hash:/etc/aliases, hash:/opt/majordomo/aliases
alias_database = hash:/etc/aliases, hash:/etc/sympa/aliases.sympa.postfix

#recipient_delimiter = +
recipient_delimiter = +
- Postfixをリロードする
# systemctl restart postfix
HTTPサーバの設定
- サービス起動スクリプトを編集します
# vi /etc/sysconfig/sympa
-----------------------------
# With sympa-httpd, uncomment folowing line.
#FCGI_OPTS="-M 0600 -U apache"
FCGI_OPTS="-M 0600 -U apache"
- サービスを登録します
# systemctl enable wwsympa
- ApacheのSympaのアクセス権がローカルのみのため、全許可に変更する
# vi /etc/httpd/conf.d/sympa.conf ----------------------------- <Location /sympa> SetHandler fcgid-script # Don't forget to edit lines below! #Require local Require all granted </Location> - Apacheを登録・起動する
# systemctl enable httpd
# systemctl start httpd
- sympaを登録・起動する
# systemctl enable sympa
# systemctl start sympa
- wwsympaを起動する
# systemctl start wwsympa
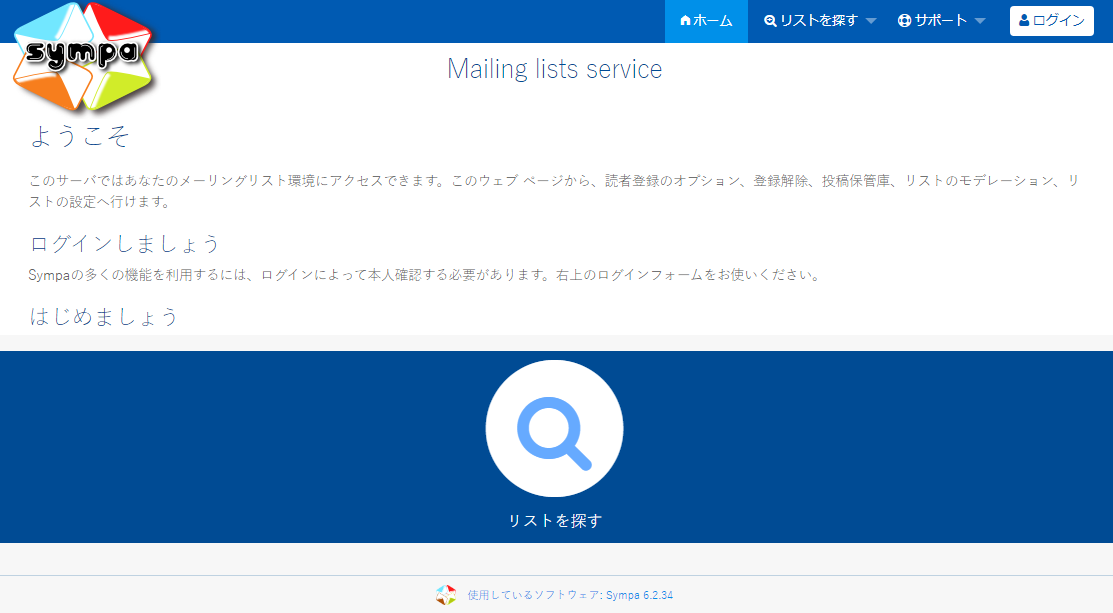
- ブラウザでセットアップ画面にアクセスする
https://サーバのIPアドレス/sympa
初回ログイン
ログイン画面に移動し、「まだログインしたことがない」のリンクへ移動して
sympa.confに設定したlistmasterのメールアドレスを入力する。その後、
listmasterのメールアドレスにパスワード初期設定フォームのアドレスが発行される。
以上